Inexpensive DIY Centerpieces Tutorial
How to Make 2 Tier Paper Centerpiece
Materials
Ordinary cream plates, a dark blue, matt, wavy/corrugated paper, a
metallic gold wavy/corrugated paper, a translucent gold ribbon, a cream
paper lace cake circle, cream dried flowers, paper towel rolls, yellow,
paper cup holders, candies and cupcakes.
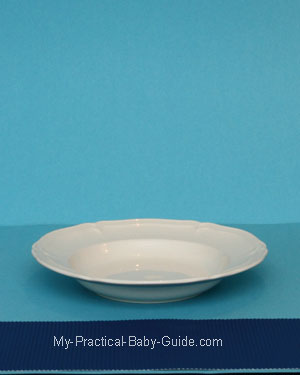
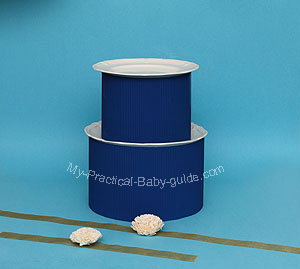
Step 1 - Place a soup bowl on the table. The bowl will support the tier at its base and will keep it in a perfect round shape.
Step 2 - Measure the circumference of the bowl. For the first tier cut the wavy paper across the lines in the length of the circumference adding 2 inches for overlapping. Make sure that the ends meet accurately.
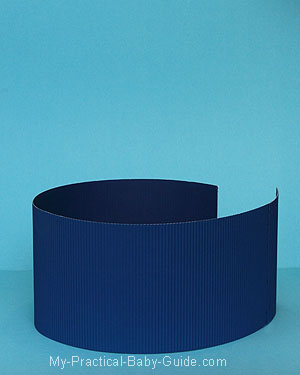
Step 3 - Place the stripe of the wavy paper around the bowl.
Step 4 - Using a stapler, attach the two ends of the paper both in the upper and lower edges making sure that the lines of the wavy paper are parallel to one another and the tier sits straight on the table.
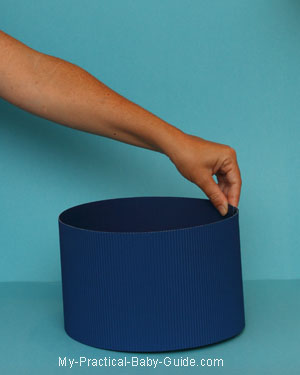
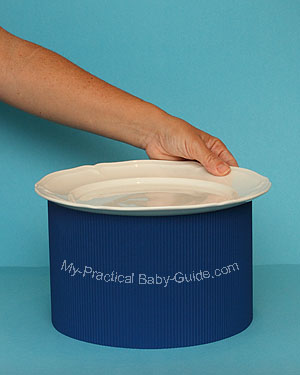
Step 5 -Insert the bottom of a dinner plate into the opening of the first tier. This will support the top of the tier and will keep it in a perfect round shape. Make sure that the plate is big enough to support the tier and that its edges extend from the tier by at least 3/4 ".
Notes:
If your plate does not have a wide rim or you prefer an additional support, put a bowl or any other suitable object on the base plate and place the top plate on it. Make sure that the object that you add is in the right height for your top plate to sit comfortably.
(We do not think that this is necessary because the piece is meant to be used for a short time and for decoration purpose only).
Another tip: A good quality plastic plate will be just as good as porcelain, you may prefer using it as it weighs less.
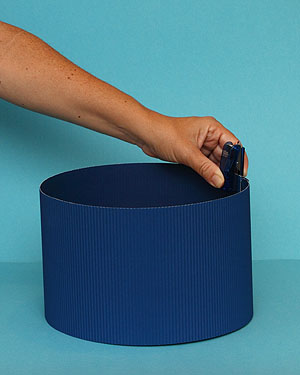
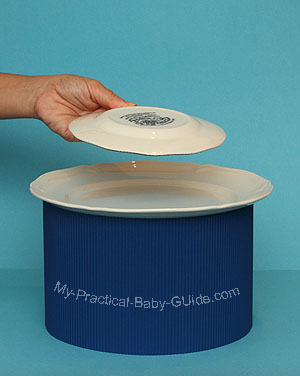
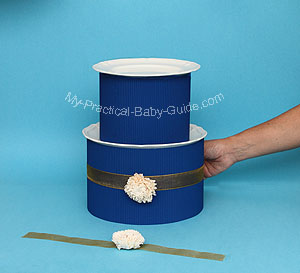
Step 6 -To stabilize the second tier, place a smaller plate on top of the dinner plate.
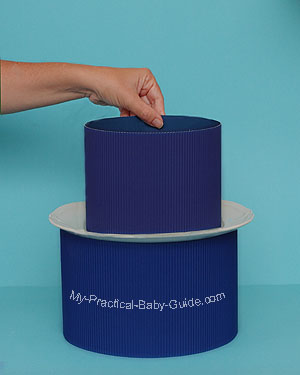
Step 7 - Repeat the process for the second tier as in step 3.
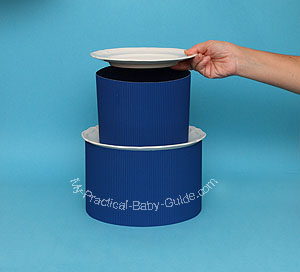
Step 8 -Insert a salad or a first course plate into the opening of the second tier.
Please see our comments regarding an additional support in step 5.
Step 9 - Decorate your tiers with ribbons.
Step 10 - Attach a ribbon with a strong double sided tape to each one of the tiers.
Step 11 - Cut stripes of metallic wavy paper in a size that will fit the cup cakes.
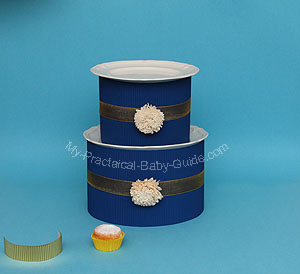
Step 12 - Attach the ends with a stapler.
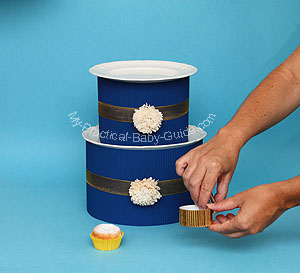
Step 13 - Insert the cup cakes into the wavy paper bases and arrange on top of the tier. Arrange all other suggested items as in the picture and voila what a lovely centerpiece!
A detailed tutorial on how to make the cylinder favor box and the vase cover will follow as soon as possible so, please visit us again soon.

You May Also Like


Need Inspiration?
Start Here
Like what you see?
Follow me
|
|
Email Newsletter
Subscribe to our free email newsletter to stay up to date regarding Pregnancy, Baby Shower, Labor & Babies.
New
Winnie the Pooh Games

New
Tutorials
Baby Shower Favors To Make

New Tutorial
Merry Go Round

New
Wishing Tree Ideas

New
DIY Themed Centerpieces

We will be more than glad if you leave your comments in the box below.